Translate

Sunday 29 December 2013

New Features and Fixes in VCOrganizer (Build 292)

The new VCOrganizer and vcCalendar (Build 292) has been published to Play Store and Amazon App Store. For users who downloaded the app from Samsung App store, it may take some times due to the Samsung App Store app submission processes (We are sorry for the inconveniences caused).

The latest VCO Pro, VCO Ent+ and VCO Pro+ are published, For the other VCO versions (such as VCO Adv, VCO Std, VCO Tab...) they will be published soon.

Major Changes


  • Share data to/from other apps. You can also share data from VCO Tasks app to VCO Calendar or VCO Notes App, and vice versa. When you share the data within VCO Apps, the title, categories and notes will be copied correct fields.
  • Allow user to select multiple categories in category filter.
  • You can select days of week when configuring AutoSync
  • The user interface is fine-tuned for for HD devices such as Amazon Kindle HDX. etc.
  • Increase VCO Contacts App photo resolution.
  • Adjust categories color
  • Change the app Logo
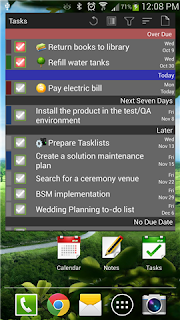
  • In VCO Tasks App, you can sort tasks by date and categories.

Fixed

  • Bluetooth Sync issue (please also upgrade to the latest SyncCenter 7.1.100)
  • Deleted recurring instance doesn't sync to VCO Calendar from Outlook. To fix it, please update the recurring event (any recurring instance) again and sync with VCO.  
  • If encryption is enabled, when you backup in Plain-Text mode, it doesn't decrypt the notes.


Best Regards,
David Tin,
Product Manager
Vecal.biz
VCOrganizer syncs Outlook (notes, tasks, events and contacts) to your Android phone and tablet.

Friday 20 December 2013

Cannot find SyncCenter?

Symtom

When sync with Outlook using WiFi mode, VCOrganizer prompts "Cannot find SyncCenter". 

Causes/Solutions

There are a lot of reasons VCOrganizer cannot discover the SyncCenter. Here are the 3 most possible causes that VCOrganizer cannot discover the SyncCenter via WIFI wireless connection:
  1. The firewall on your PC blocks the connection
  2. The VPN on your PC blocks the connection
  3. Antivirus might contribute the issue.
  4. The android device and the PC are not on the same subnet.
  5. Your phone/tablet is connected to a guest network on your WIFi access point (please check your WIFI router settings) 
  6. You have not started SyncCenter on your PC.
Please try to turn the items 1 to 3 off temporarily to isolate the cause of the sync failure.If it is firewall issue, VCOrganier uses UDP broadcast IP 255.255.255.255, port: 11000, and communication port 8182. You can try to turn on the firewall and change the firewall settings to allow the communication, and see if that works for you. 

Please do the following:

  • Make sure you have installed SyncCenter on your PC
  • Make sure your PC and your Mobile are on the same subnet (e.g you pc and your mobile are connected to the same WIF access point, please also turn off your Guest network on your WIFi access point if you have enabled it).
  • Restart your PC, mobile, and router.
  • On your PC, start SycnCenter and make sure WIFI mode is selected.
  • On your phone, turn on your WiFi, not the 3G data.
  • To isolate the issue, please make sure you have turn off your firewall and antivirus software (if this is a firewall issue, you can add the exception rules to your firewall later)
  • Then, sync again
If you still see the "Cannot find SyncCenter" message, please send the following information to VCOrganizer Support
  1. On PC, in SyncCenter -> About tab, please let us know what IP address do you see?
  2. On your Phone/tablet, in VCOrganizer Settings, scroll to the bottom, please let us know what IP address do you see?
  3. If you enter the IP address that you see in (1)  in VCOrganizer Sync screen, and press the start button, is VCOrganizer able to sync with Outlook?

Additional Information

Configure Firewall for VCOrganizer WiFi Sync

It depends on how your firewall is configured. For most of the users, you don't need to change any firewall settings. If you have identified that Firewall is the cause of sync issue, please do follow:

For Windows Firewall:

  • In Control Panel -> System and Security -> Windows Firewall
  • Click the "Allow Program to communicate through Windows Firewall"
  • Click "Change Settings"
  • Click the Add another program
  • Click the browse button, and select
    C:\Program Files\Vecal\VCOrganizer\VCOrganizer\VCOrganizer.exe (assume you have installed SyncCenter
    in this directory)
  • Then, click the Add button
    You should see the "OutLookSync", select it and click the Details button
  • Then, click the "Network location types. Check both Home/Work, and Public checkboxes. Then, click OK
  • Try to sync again


For McAfee Total Protection:

Please add the following ports rules:

TCP/IP-porte: 8182
UDP-porte: 8182
Open ports to: All PCs

TCP/IP-porte: 11000
UDP-porte: 11000
Open ports to: All PCs


Best Regards,
David Tin,
Product ManagerVecal.biz
VCOrganizer syncs Outlook (notes, tasks, events and contacts) to your Android phone and tablet.


Sunday 3 November 2013

Sync with Google Tasks

If you have purchased the vcTasks Key For Premium, you can sync tasks to Google Cloud. There are two options.

  • You can download the vcTasks app (), and sync the Google tasks to this app and keep them separated from VCO Tasks App.
  • You can also configure VCO to sync with Google Tasks on Google Cloud so that you can sync tasks between Outlook, VCO Pro Tasks app, and Google Tasks


Remark:

  • You should use either one of these options above, but not both.
  • You need Google Play Services to sync with Google Tasks.
  • You must have VCO with build version 270 or above.


Here are the steps to sync with Google Tasks in VCO Tasks App:


  1. Please purchase vcTasks Key For Premium from Play Store (We are doing BIG discount for VCO Users at this moment, it's only AUD 0.99).
  2. Start the vcTasks Key For Premium app to activate the license.
  3. In VCO Tasks App menu, you should see a new option called 'Sync Google Tasks'.
  4. Select 'Sync Google Tasks', and select the Google account that you want to sync with. You can sync with multiple Google accounts. But during setup, you can only register one Google account each time.
  5. Then , click the "Sync Now" button ()to start the sync process.
  6. Once you have registered the Google account, you should see a sync button on the top right of the screen. You can click the sync button to trigger the sync manually.
  7. After you have synced with Google Tasks, you should see a list of task lists in the task lists dropdown option.  In the task lists dropdown option, you should see the "All Tasks", "Local Tasks", and all the task lists on Google cloud.
  8. If you want to create a task under a specific task list, please select that task list from the task list option, and click the "Create Task" button or use the "Quick Tasks" option.

    - If you create a task under the Google task list, the task will be synced to Google in the next sync process.

    - If you create a task under the "Local Tasks" list, the tasks will not be synced to Google cloud

    Therefore

    - If you want to create a task that synced between Outlook, VCO Tasks App and Google cloud, you should create a task under a Google task list.

    - If you want to create a task that only synced between Outlook and VCO Tasks App (but not Google cloud), you should create the task under a "Local Tasks".  
  9. After the task is created under any of the Google task list, the tasks will be synced to Google cloud automatically in about 5 minutes. (when the autosync process is started, it will check if the screen is and WiFi is enabled. If it's not (for example you are using the phone, or there is no WiFi connection), it will skip and wait for another 5 minutes. If only mobile data is enabled, the autosync process won't start. This is to protect your phone data usage.
  10. If you want to sync the updates to Google cloud immediately, you can also click the "Sync" button on the top right to start the sync immediately. If you start the sync manually, it will sync either you have WiFi or Mobile data enabled.
  11. By default, when  you sync tasks from Outlook to VCO, it the tasks will be synced to "Local Tasks" only. It won't be synced to Google. However, you can set a Google task list as default task list in VCO Tasks App. Once the Google task list is set at default, all the tasks that synced from Outlook will be created in this task list and will be synced to Google Tasks automatically.
  12. To set a task list as default, select the task list from the task list dropdown option. Then, select "Set as Default Task List" option () from the menu.
  13. If you want to move existing tasks to a Google task list, please read this post "Move tasks between task lists".
  14. By default, the autosync process should be run in about 5 minutes after you have updated/created or deleted any tasks in VCO Tasks App, or during the day end process (at about 00:05). If you want to stop the autosync process (for whatever reason) you can uncheck the checkbox "AutoSync" in the "Sync Google Tasks" account selection screen.
  15. While the "AutoSync" is disabled,  you can still start the sync process manually using the "Sync" button in the VCO Tasks screen ().
More:


Screen Captures for References:


Select "Sync Google Tasks"


Select A Google Account to Sync With


The Task List dropdown list shows a list of task lists


If you select "Manage Task Lists" option, you can create, rename or delete task list. (Remark, this action will be synced to Google)

New Features in VCOrganizer (Build 272)

The new VCOrganizer Pro (Build 272) has been published on Play Store. For the other VCO versions (such as VCO Ent+, VCO Pro+, VCO Std .._) they will be published soon.
  1. User can create linked items (notes, tasks, events or contacts) directly from view mode.
    e.g:
     Open a task in view mode, create a note that links to this task.
     Open a event in view mode, create a task that links to this event.
     Open a note in view mode, create a task that link to this note ..etc.
  2. Edit note from Tasks/Event view mode.
  3. Allow user to assign icon to tasks/events (more than 200 icons).
       assigned icon will be displayed in vcCalendar app, vcTask app, and notifications
       (icon information will not be synced to Outlook or android)
  4. Allow completed tasks to be displayed by data completed.
    By default, tasks are displayed by due date in the calendar. You can enable this feature to display by date completed.
  5. New Widget layouts with themes (black/white/transparent)
  6. Allow user to change backup/restore location
  7. You can now backup in plain-text mode (by default, it's encrypted mode).
  8. If you have purchased the VCTASKS KEY FOR PREMIUM from Play Store, VCO can sync with tasks with Google Tasks on cloud. 
  9. If you want to store the Google tasks in a separated app, you can also download the vcTasks app from Play Store. For details, please read "Sync with Google Tasks()


Latest Images

Here are some of the images:


Friday 31 May 2013

How to Sync with Outlook on Remote PC?

Here is an interesting question from one of our customer that I would like to share.

Question:

I am away from the office or home for several weeks at time and make changes to calendar, tasks...etc. on phone. Nightly, I remote into office or home PC. After a while, outlook events are not matching up with events in phone.

Can I sync Android and Outlook on my remote PC using VCOrganizer?


Answer:

Yes, you can.

You need the following:

  1. Fix IP address  (If this is your home network, which should be provided by your ISP depends on what plan you are using)
  2. Configure port forwarding on your router.


Assume you have PC A at home with fix ip 111.222.333.444 assigned by your ISP. And you have your mobile phone which is connected to the internet.

  1. You need to set the port forward at home's router to forward request from 8182  to port 8182  on PC A
  2. If necessary, you can enable the VPN feature on your router it supports VPN.
  3. You can also set sync password in SyncCenter -> General tab if necessary. 
  4. Connect your phone to internet (using 3G or 4G, if you have VPN enabled, you can connect VPN), then enter the ip address of 111.222.333.444 in VCO Sync screen.
  5. Done.

Remark: The IP address 111.222.333.444 is an example. You need to check with your ISP to see if you have a fix IP.

If you do not have a public IP, please see this blog  Chat - Sync with Outlook

If you still have questions, please feel free to contact support at support@vecal.biz

Cheers,
David Tin,
Product Manager
VCOrganizer syncs Outlook (notes, tasks, events and contacts) to your Android phone and tablet.


Friday 17 May 2013

How to change an individual recurring instance of the recurring event?


To update the recurring event instance, it's easy. You can edit the recurring instance or just do a cut/paste in the Week View.

Edit the Recurring Instance

  • In the Calendar, select the recurring event instance that you would like to update. 


  • Tap on the event to open it in Detail Screen

  • Tap the Edit button to enter edit mode and select "Open this occurrence" from the popup menu

  • Update the start date (e.g change from 22 May to 23 May) and click tap Save button to apply the change.

  • You should see the event being updated in the Calendar view.


Cut/Paste

You can also use Cut/Paste method to update the recurring instance time.
  • In the Week View, tap on the event instance that you would like edit

  • Select "Cut" from the popup menu

  • Long press on the timeslot that you would like this recurring instance to paste to. Select Paste from the popup menu


  • Then, in the popup menu, select the timeslot you would like to paste to.


  • Done.


Remark:
  • If you use VCOrganizer to sync with Outlook, the updated recurring instance will be synced to Outlook after sync.
  • If you have configured to sync events with Android Calendar, the corresponding event instance in Android Calendar will be updated immediately. 


How to Create Recurring Event in vcCalendar (occur every third Tuesday of the month)?


From time to time, some customer ask how to create recurring event in vcCalendar, here is one of the example and I would like to share with you.

Question:
How do I make an event recur?  I have one things that occur every third Tuesday of the month. Cutting and pasting is fairly easy, but a pain in the neck.

Answer:
Here are the steps to create the recurring events in VCO Calendar that occur every third Tuesday of the month:

  • In Calendar, tap the "Create" Event button. 


  • In the Create Event view, enter the subject.

  • Scroll to the "Recurrence" section and tap the Space below the "Recurrence" line.

  • In the Recurrence screen, you can select your start at/end at time, then select “Monthly” in the Recurrence Pattern

  • In the Monthly recurrence mode, tap on the "first" button. You will see  a popup menu,  select "Third" from the list.


  • Then, tap the button next to the "third" button,  select "Tuesday" .

  • Then, you select the "Start/End" date.
  • Then, tap the "Save" button on the top right corner. It will go back to the Create Event view.

  • Then, tap the "Save" button in the Create Event view
  • Done.
  • You will see the recurring event in the Calendar Text mode, if you switch to Bar mode, the event icon will indicate that this is a recurring event.

Remark:
  • If you are using VCOrganizer to sync with Outlook, after syncing with Outlook, you should see the same recurring event in Outlook Calendar. If you can edit/delete any recurring instances in VCO or Outlook, they should be keep in sync.
  • Regarding the recurring instances in Android Native Calendar, please visit our FAQ for details "Recurring event instances between VCO Calendar and Android Calendar".


vcCalendar - Diary View


Calendar Diary View provides a easy to use interface to show your events/tasks/contacts in a scrollable list.

  • Tap day header row to show popup window which allows you to create events / tasks on that day
  • Long press on the day header row to show the context menu, which allows you to paste copied event or task to the selected day
  • Tap on the item row to show the item detail screen
  • Long press on the item row to show the context menu, which allows your to copy, cut or delete the selected item.
  • When you are in Diary View screen, tap on the Diary view button again to go to Today


vcCalendar - Day View


Calendar Day View provides a quick graphical or textual overview to show your events/tasks/contacts of the selected day. You can switch between Bar mode or Grid Mode.

In Bar Mode

  • The top part with blue rectangle on the right is the all day events region. The all day events, tasks or contacts are displayed in this region. If there is more items than it can display, you will see a  blue triangle on the bottom right corner
  • Swipe horizontally over screen to go to next/previous day
  • Scroll vertical over the calendar to view events in different time period.
  • Zoom view with 2 fingers (zoom gesture). In zoom mode, double tap on the calendar to go back to non-zoom state.
  • Tap on the event to open the event detail view
  • Tap single timeslot to show popup window, which shows the events/tasks/contacts on that date. It also allows you to create event on the selected timeslot or task on the selected day
  • Long press on specific timeslot to bring up the context menu which allows you to create/paste item on the selected timeslot.
  • Items background color is based on the color of their primary category
  • Tap on the Day View button again to go to Today
  • When you switch to the Day Mode (or long press on the Day Mode button), you should see a days slide bar and a switch mode button above the toolbar.
  • Press and slide on the days slide bar to show 1 to 14 days of events
  • Tap the Switch mode button to switch to Grid Mode.


In Grid Mode

  • It allows your to see the events subjects in more details
  • Swipe horizontally over screen to go to next/previous day
  • Zoom view with 2 fingers (zoom gesture).  In zoom mode, double tap on the calendar to go back to non-zoom state.
  • If there is more items than it can display, you will see a  blue triangle on the bottom right corner 
  • Tap on the event/task to open the detail view screen
  • Tap on blank area or tap on the title bar on that day to show popup window, which shows the events/tasks/contacts on that date. It also allows you to create event or task on the selected day
  • Tap on the Day View button again to go to Today
  • Long press on the grid cell to bring up the context menu which allows you to create/paste item
  • Items text color is based on the color of their primary category
  • When you switch to the Day Mode (or long press on the Day Mode button), you should see a days slide bar and a switch mode button above the toolbar.
  • Press and slide on the days slide bar to show 1 to 14 days of events
  • Tap the Switch mode button to switch to Bar Mode.


vcCalendar - Week View


vcCalendar Week View provides a quick graphical or textual overview to show your events/tasks/contacts of the selected week. You can switch between Bar mode or Grid Mode.

In Bar Mode

  • The top part with blue rectangle on the right is the all day events region. The all day events, tasks or contacts are displayed in this region. If there is more items than it can display, you will see a  blue triangle on the bottom right corner
  • Swipe horizontally over screen to go to next/previous week
  • Scroll vertical over the calendar to view events in different time period.
  • Zoom view with 2 fingers (zoom gesture). In zoom mode, double tap on the calendar to go back to non-zoom state.
  • Tap on the event to open the event detail view
  • Tap single timeslot to show popup window, which shows the events/tasks/contacts on that date. It also allows you to create event on the selected timeslot or task on the selected day
  • Long press on specific timeslot to bring up the context menu which allows you to create/paste item on the selected timeslot.
  • Items background color is based on the color of their primary category
  • Tap on the Week View button again to go to Today
  • When you switch to the Week Mode (or long press on the Week Mode button), you should see a days slide bar and a switch mode button above the toolbar.
  • Press and slide on the days slide bar to show 1 to 14 days of events
  • Tap the Switch mode button to switch to Grid Mode.


In Grid Mode

  • It allows your to see the events subjects in more details
  • Swipe horizontally over screen to go to next/previous week
  • Zoom view with 2 fingers (zoom gesture).  In zoom mode, double tap on the calendar to go back to non-zoom state.
  • If there is more items than it can display, you will see a  blue triangle on the bottom right corner 
  • Tap on the event/task to open the detail view screen
  • Tap on blank area or tap on the title bar on that day to show popup window, which shows the events/tasks/contacts on that date. It also allows you to create event or task on the selected day
  • Tap on the Week View button again to go to Today
  • Items text color is based on the color of their primary category
  • Long press on the grid cell to bring up the context menu which allows you to create/paste item
  • When you switch to the Week Mode (or long press on the Week Mode button), you should see a days slide bar and a switch mode button above the toolbar.
  • Press and slide on the days slide bar to show 1 to 14 days of events
  • Tap the Switch mode button to switch to Bar Mode.


Cheers,
David Tin,
Product Manager
VCOrganizer syncs Outlook (notes, tasks, events and contacts) to your Android phone and tablet.